This is a video of the physical properties of some pieces that were printed and post cured.
Thursday, December 29, 2011
Saturday, December 24, 2011
3D Printer DLP Printing with UV resin...
What can I say? The title pretty much gave it away...
It's an early Christmas Present...
Questions will be partially answered after 27th and fully after New Years!
It's an early Christmas Present...
Questions will be partially answered after 27th and fully after New Years!
Wednesday, December 14, 2011
Red Red Wine Plexiglass 2423
I have tested a Mini VAT resin with a 3mm thick sample ( 2423 ) red transparent
acrylic plexiglass piece provided by a local company and the results are only
mediocre.

It seems to block some, but not all of the UV and Near Visible.
Comparing to a Lee Filter sampler "Bloody Red", the 2423 allowed a 0.5mm resin
slice to polymerize in 2~5 minute exposure, while when it was placed over the Lee Filter it did not
exhibit any polymerization for 20 min.

This is what it looked like in the mini VAT. A tribute to the RepRap crowd for inspiration and information.
I would assume (have to confirm) it will be safe if used with an incandescent or florescent bulb. Do not expect the red 2423 to stop the UV from sunlight or other sources from ruining a VAT full of resin and the print.
Sunday, December 11, 2011
New VAT + DuPont Teflon FEP Film
Time to marry these two together.
For now I'm just folding the film in place.

I used some clips and an old ruler to cut two pieces 95mm in length:

and stretched the Teflon Film on top of the glass. It kind of clings to the glass by itself.
Just secured it on two opposite sides:

That is it for now... Later!
For now I'm just folding the film in place.

I used some clips and an old ruler to cut two pieces 95mm in length:

and stretched the Teflon Film on top of the glass. It kind of clings to the glass by itself.
Just secured it on two opposite sides:

That is it for now... Later!
Got DuPont FEP Teflon?
Got Milk? No?
Got DuPont FEP Teflon then? YES!
First Impressions:
It is a plastic, clear and somewhat like cellophane used in the floral business. There is an adhesive backing version, so
that would be the one to get, but could not find a source for it. In my neck of the woods Dupont does not even import or distribute the FEP film(Fluorinated
ethylene propylene). When you heat it up it becomes more flexible. I wrote about
this in http://3dlprint.blogspot.com/2011/11/i-know-you-have-asked-yourselves-this.html
I had a small sample piece then, now I have a much larger sheet, also thicker.
when I unroll even 5~10cm it is statically charged. It is hydrophobic, rather
resinophobic i.e. it repels resin and forces it to try to minimize the contact
surface.
I placed a drop of resin and spread it around:

 as you can see just on its own it tried to form a sphere.

 The cured resin is released easier than silicone, but not by that much.

What helps is that it flexes and literally peeled off the cured resin.
There were no ill effects to the film after polymerizing a drop of resin on top of it.
 I wiped it with a cotton cloth and then paper towels with Isopropyl Alcohol.
Clearly "THE SECRET" ingredient in a lot of printers.
More to come...
Got DuPont FEP Teflon then? YES!
First Impressions:
It is a plastic, clear and somewhat like cellophane used in the floral business. There is an adhesive backing version, so
that would be the one to get, but could not find a source for it. In my neck of the woods Dupont does not even import or distribute the FEP film(Fluorinated
ethylene propylene). When you heat it up it becomes more flexible. I wrote about
this in http://3dlprint.blogspot.com/2011/11/i-know-you-have-asked-yourselves-this.html
I had a small sample piece then, now I have a much larger sheet, also thicker.
when I unroll even 5~10cm it is statically charged. It is hydrophobic, rather
resinophobic i.e. it repels resin and forces it to try to minimize the contact
surface.
I placed a drop of resin and spread it around:


What helps is that it flexes and literally peeled off the cured resin.
There were no ill effects to the film after polymerizing a drop of resin on top of it.

Clearly "THE SECRET" ingredient in a lot of printers.
More to come...
New all glass VAT
That time of the year for a new VAT again.
After some calculations a few posts back I realized I will have to add resin midway if I print a larger object, hence the current post and need for a bigger VAT.
If you need to print a smaller item, the VAT may prove too big, but you can always drop a block of 70mm x 90mm x 10mm glass and use less resin.
This time it is all glass with a bit of 100% silicone.
BOM:
1- 200mm x 150mm 5mm soda lime glass ( regular window ).
2- 200mm x 20mm x5mm of the above.
2-100mm x 20mm x5mm of the above above.

 Mark the location of the walls lightly with permanent marker.
Spread some silicone on the bottom edge and the side edges and repeat on all 4 sides.

Use some tape to hold the glass in place after you glue it. Leave it undisturbed at least overnight.
I slid out the glass window, but left the aluminum rails and inserted the new VAT and tightened the grub screws.


Perfect fit!
Cheers!
After some calculations a few posts back I realized I will have to add resin midway if I print a larger object, hence the current post and need for a bigger VAT.
If you need to print a smaller item, the VAT may prove too big, but you can always drop a block of 70mm x 90mm x 10mm glass and use less resin.
This time it is all glass with a bit of 100% silicone.
BOM:
1- 200mm x 150mm 5mm soda lime glass ( regular window ).
2- 200mm x 20mm x5mm of the above.
2-100mm x 20mm x5mm of the above above.


Spread some silicone on the bottom edge and the side edges and repeat on all 4 sides.

Use some tape to hold the glass in place after you glue it. Leave it undisturbed at least overnight.
I slid out the glass window, but left the aluminum rails and inserted the new VAT and tightened the grub screws.


Perfect fit!
Cheers!
Wednesday, December 7, 2011
Some pictures of where it stands.
Decided to step back and take some shots of the overall state the machine is in. Hope you like them ( what's not to like?):


And some closeups of the Build Base:


I am happy to report that the remote of the DELL 5100MP is actually a wireless one, not an Infrared - Meaning the projector can be powered up without having to leave a hole for powering up in the side panels. Also the 5100MP has a web interface - meaning I can switch it on via software. And yet another option it has that may prove useful is the ability to play PowerPoint presentations over a network - If it can also be controller with software I might not even have to install PowerPoint Viewer 97 on the PC. We shall see later.
Prost!
Tuesday, December 6, 2011
VAT Capacity Calculations
It is time to think about the VAT again.
Consider the following:
the VAT is 125mm x 100mm x 20mm high. I have spacing for VAT sides that are up to 28mm high.
If I fill the VAT with 4mm resin it gives me 50 cc. If I lower glass base in the resin it will rise to at least 8~10mm. If I tilt the tray 5mm down I will be at a safe level of 15~17mm, but it limits me to have to fill the VAT with more resin midway if I'm printing a solid object. I will either have to rebuild the VAT with higher walls or I will use the "wait and see" approach.
When its time for Build Base, It's Build Base Time!
Famous quote from a carpet commercial, but adapted...
So, time has come to build the base.
The most common plastic I was able to find was HDPE cutting board:
 I cut 2 pieces:
5.5cm x 7cm and 7cm x 9cm:


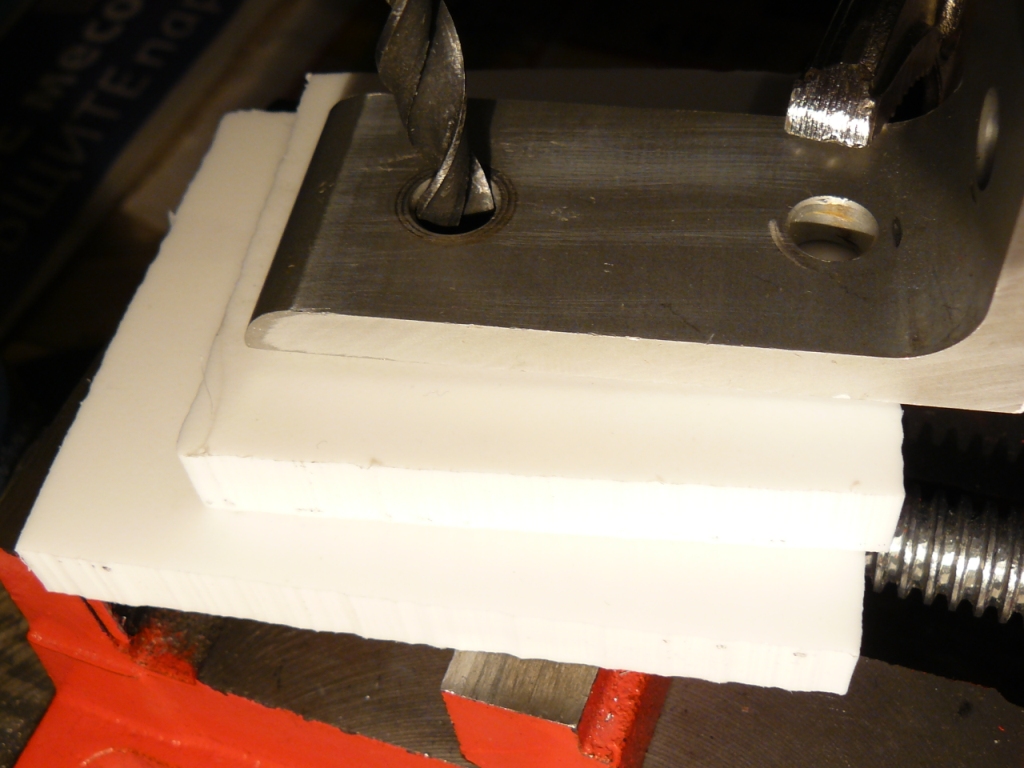
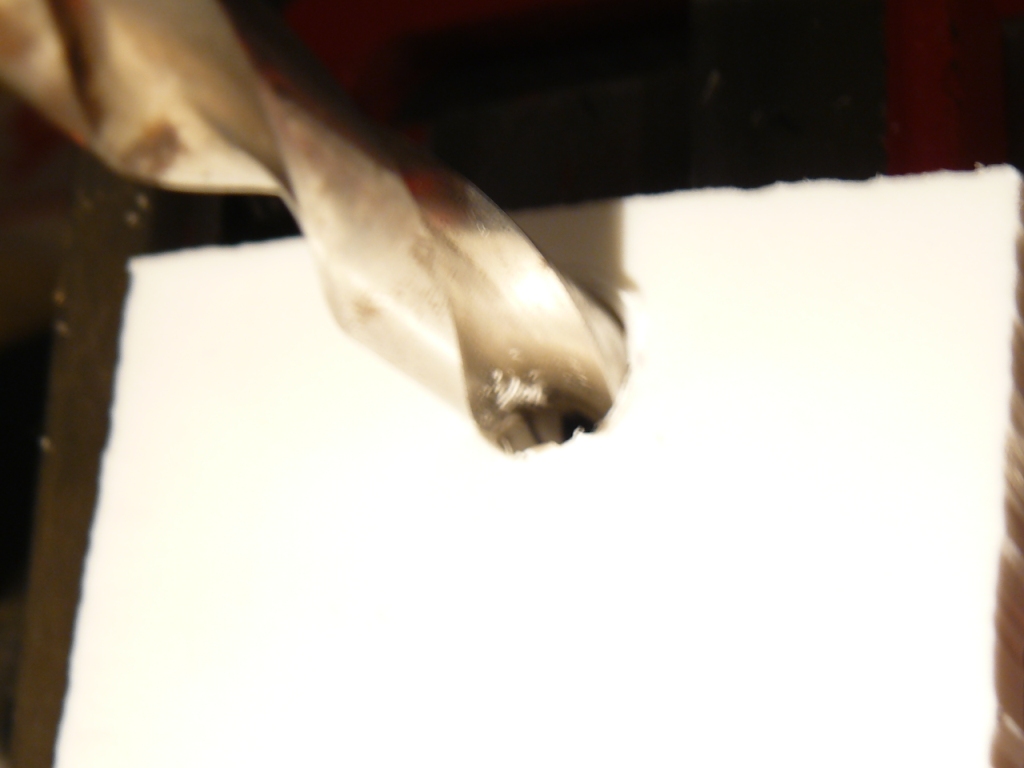
Stack and clamp for drilling: with the L-bracket:


Then drill as many holes with an M6 and use an M8 on the side opposite of the countersink for the M8 (top) to create countersinks that will be filled with BLACK silicone and a 7cm x 9cm x 10mm glass will be:


It should end up looking like this from the glass side (bottom):
 Let the HDPE and glass sandwich sit for 3~4 days without disturbing it. I know the silicone will not stick too well to HDPE, but it is only for testing. I might have to remake the build base.
Time to drill the L-bracket for the two M8 bolts and the M3 bolts that will hold the build base to the THK Linear block:


 I used M3 x 8mm slot bolts. I could not readily find Inbus (Allen head) M3. All the local hardware shops stock from M4 up.
The end result will look like this:


Seems to be stuck well, but the question is : Will it come undone under the forces needed to lift the cured resin off the VAT?
We shall see.
So, time has come to build the base.
The most common plastic I was able to find was HDPE cutting board:

5.5cm x 7cm and 7cm x 9cm:


Stack and clamp for drilling: with the L-bracket:
On the underside I needed to make a countersink for the M8 x 30 bolt head:


It should end up looking like this from the glass side (bottom):

Time to drill the L-bracket for the two M8 bolts and the M3 bolts that will hold the build base to the THK Linear block:


The end result will look like this:


Seems to be stuck well, but the question is : Will it come undone under the forces needed to lift the cured resin off the VAT?
We shall see.
Tuesday, November 29, 2011
Itching to publish!
Here it is! The VAT Tilt test X-axis. Did only a few layers, but watch the VAT tilting:
Good Night for me and Good Morning to the other side of the planet!
Good Night for me and Good Morning to the other side of the planet!
VAT-Tilt connection
It is one of the least, but not last thing left to do. The VAT to Tilt to X axis connection.
This is going to be long. Time me if you want. Start:
 Mark 7mm from each side ( you can pick another number as long as it is a sacred one ).
Drill with M4 bit and a vacuum cleaner at this point to avoid getting chips in unwanted places and shortening something.

Assembled an L shape bracket with a bolt like so:

Cut 2 x M4 threaded rod pieces in 125mm lengths:

Assemble the rods and L shape into:


Bend the rods to be perpendicular to the Meccano piece:

Now attach the Meccano piece with some M5 Inbus:


Finally bolt together, tighten and adjust with top lock nuts.

Stop!
Phew! That was a fast one. Took me longer to stop and take photos, than to actually assemble.
Yamas!
This is going to be long. Time me if you want. Start:

Drill with M4 bit and a vacuum cleaner at this point to avoid getting chips in unwanted places and shortening something.

Assembled an L shape bracket with a bolt like so:

Cut 2 x M4 threaded rod pieces in 125mm lengths:

Assemble the rods and L shape into:


Bend the rods to be perpendicular to the Meccano piece:

Now attach the Meccano piece with some M5 Inbus:

I had to recenter my X- axis to be in the center of the rods.

Finally bolt together, tighten and adjust with top lock nuts.

Stop!
Phew! That was a fast one. Took me longer to stop and take photos, than to actually assemble.
Yamas!
Subscribe to:
Posts (Atom)